Introduction
Packages in CapaInstaller have always been built on VBScript. Stille since the PowerShell scripting language is taking over the way most IT professionals manage task automation, it is now possible to build packages in CapaInstaller, using PowerShell. No PowerShell installation is needed on the client computers as the scripts are executed in PowerShell Runspaces created by the BaseAgent on the fly.
How to create a PowerPack
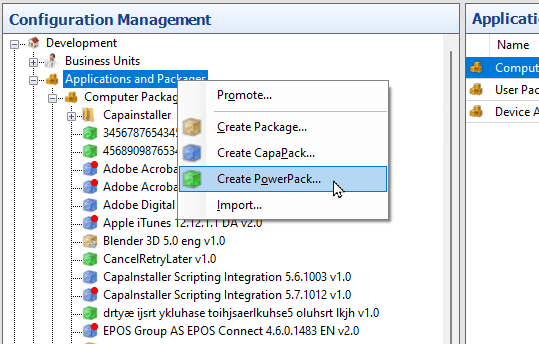
Creating a PowerPack is straightforward, as it starts by right-clicking Applications and Packages in the root point of your installation and then clicking on Create PowerPack…
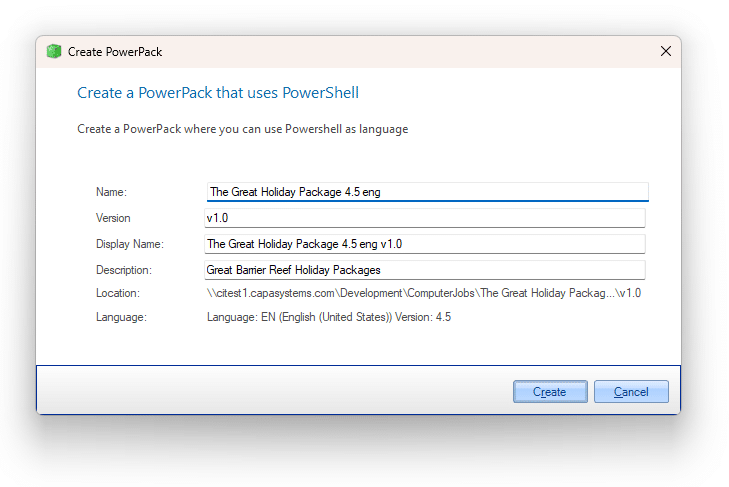
Fill in the Package Name and set a Package Version and a Description optionally. The Display name automatically follows a concatenation of name and version. You can edit the Display Name manually if you want to. When you’re done, click Create.
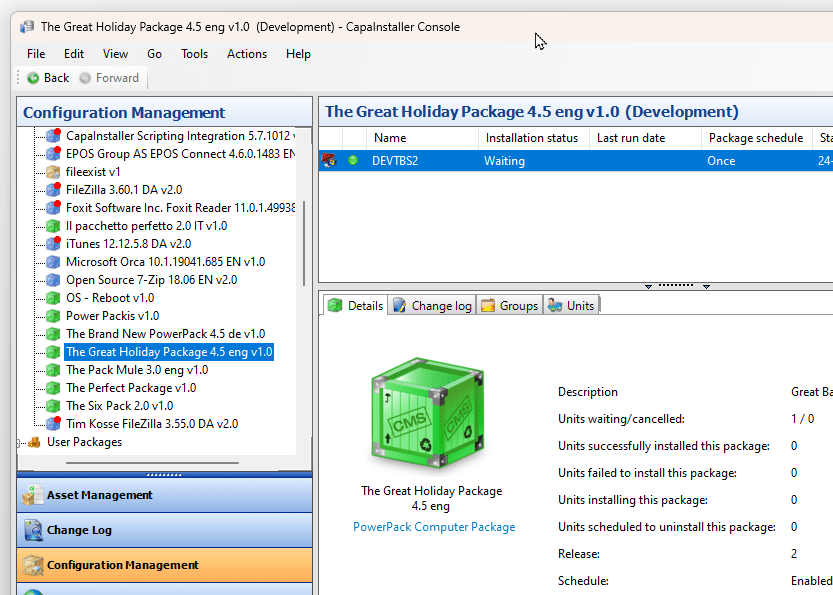
The newly created PowerPack is then visible inside the CI Console. In the same way, CapaPacks differ from native packs by the blue color, PowerPacks are shown with a green package icon.
Setting up an editor for PowerShell scripts
When editing PowerShell scripts, you can use a different editor than you typically use for other (.vbs) scripts. To set it up, click Tools => Options…
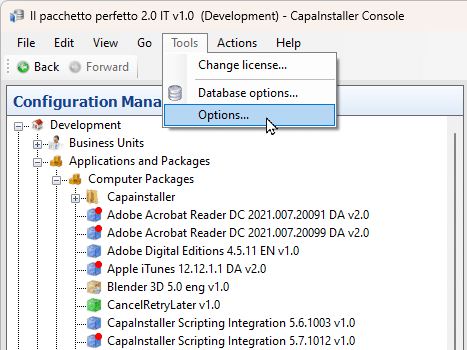
-and select the General Tab on the left side.
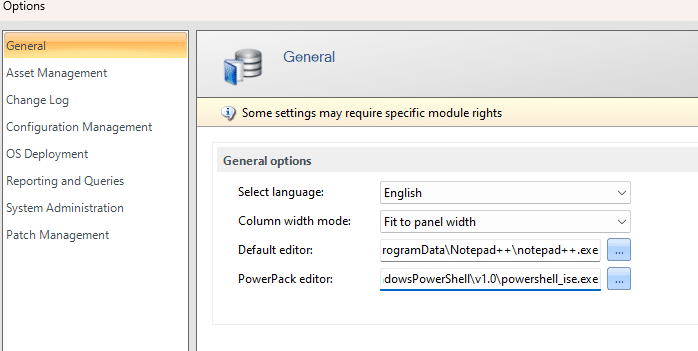
PowerShell Integrated Script Editor
The Native Integrated Scripting Editor (ise) for PowerShell is powershell_ise.exe. The full path is; %SystemRoot%system32WindowsPowerShellv1.0powershell_ise.exe.
Visual Studio Code
Microsoft also makes another powerful editor suitable for PowerShell editing; Visual Studio Code. The full path is; %LocalAppData%ProgramsMicrosoft VS CodeCode.exe
Notepad++
Another great text editor is the Notepad++ editor. The default installation path is; %ProgramData%Notepad++notepad++.exe.
If you choose to use Notepad++, then be sure to save any edited file before exiting the program, as it will not prompt you to save your changes, but instead, it will keep them in a temporary folder, from where it will be loaded, next time you start the editor. The problem with that is that the CapaInstaller Console will no longer be listening to changes to the script because the Notepad++ instance has exited.
Editing installation scripts
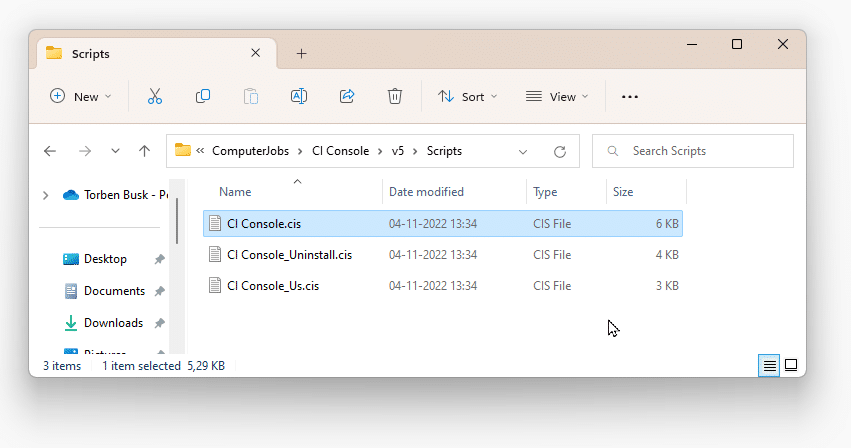
When editing installation scripts for VBScript-based packages, the default editor is launched with the full path of the script, which is located inside the Package in the Scripts folder., like this;
For PowerPacks, however, the installation scripts are located in the SQL database (in the JOB table). When you right-click on a PowerPack and then select ‘Edit installation script’, the script is saved in a temporary folder, and the PowerPack Editor is then launched with the temporary script.
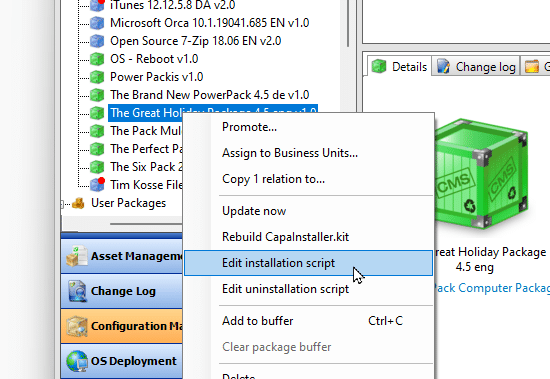
The Ci Console will monitor the file and track any changes when you save them. To ensure that the changes made were deliberate, the Change log dialog is shown to let you add a reason for the edit.
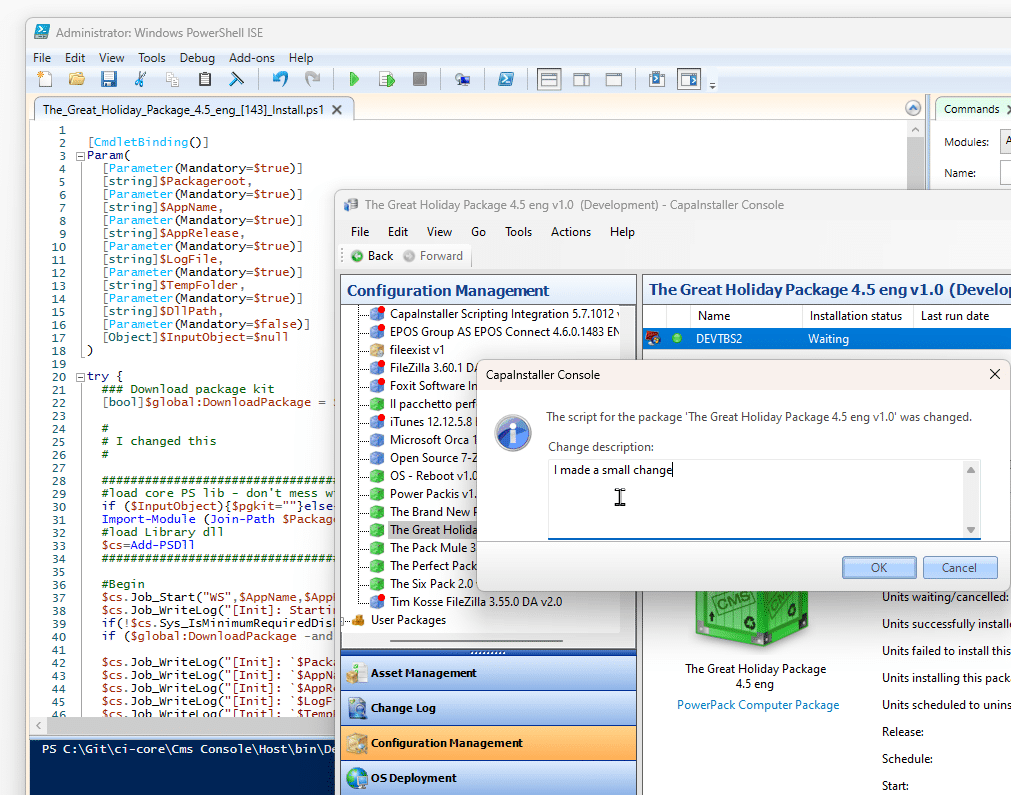
When you click Ok, the script is saved to the database.
Having the installation scripts in the database offers the ability to edit the scripts and install the package without starting an ‘Update Now’ synchronization action to other containers. This means that changes to the installation script of a PowerPack will have immediate consequences for anyone installing the package on any client connected to any FrontEnd in the whole installation. Even for clients that receive the CapaInstaller.kit file from its file cache, a nearby peer (FileSharing), or a Distribution Server, the Installation/uninstallation script is fetched from the database.
How PowerPack installations work
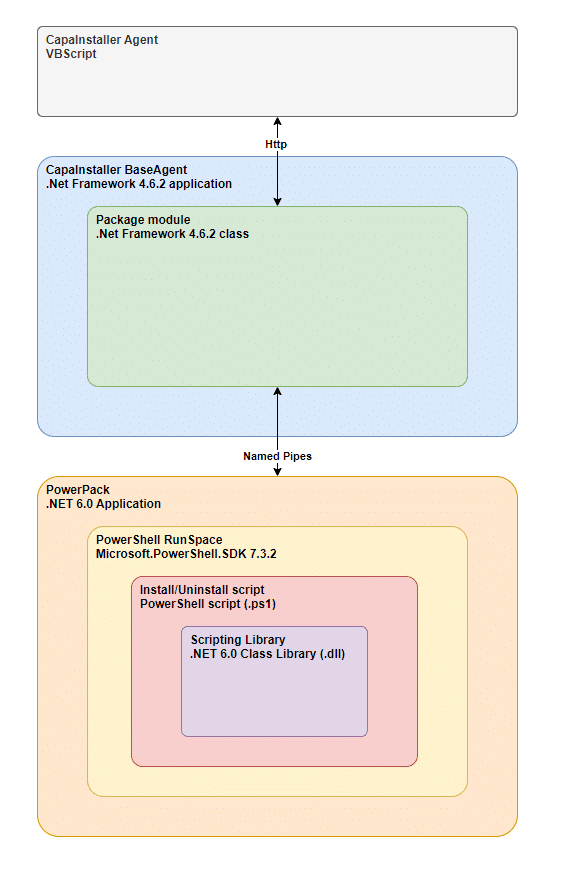
When the Agent script runs, it works its way through the list of packages to install. When a given package type is VBScript, it calls the VBScript directly. When the package type is PowerPack, the Agent script posts a JSon object into the BaseAgent, instructing it to Install the package with id: 131 (in this example)

The BaseAgent then orders the PackageModule to create a new Package job and start it.
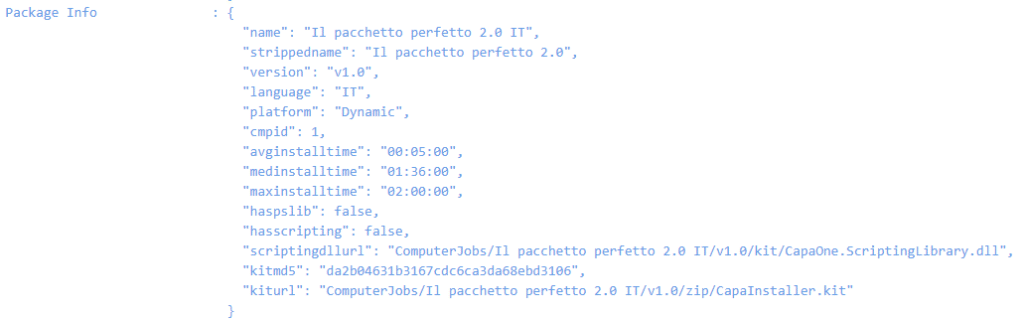
The PackageJob initializes by requesting PackageInfo from the Frontend. The PackageInfo contains the information needed to install the package;
Because the CiBaseAgent is a .Net Framework 4.6.2 application and Managed Powershell execution runs in a PowerShell RunSpace, which is only available in .NET Core, the PackageJob shells into the PowerPack.exe, .NET Core 6.0 application that will host the installation (or uninstallation).
Upon startup, the PowerPack.exe establishes a Named Pipe connection to the PackageJob inside the CiBaseAgent, from which it receives the installation script fetched from the FrontEnd as part of the PackageInfo response. The Powershell script only exists in memory and is never written to disk on its way from the SQL database → CiFrontEnd → CiBaseAgent → PowerPack → Powershell Runspace instance, where it is executed.
While the installation PowerShell script is executed, progress and log messages are sent back to the PackageJob, inside the BaseAgent. When the script completes, an exit code is also sent back to the PackageJob before the RunSpace is disposed and the PowerPack process has ended.

When the PackageJob has received an exit code, the progress is sent back to the CapaInstaller Agent VBScript, which ends the package and moves to the next job.
Taking a look at all the logfiles
Where are they?
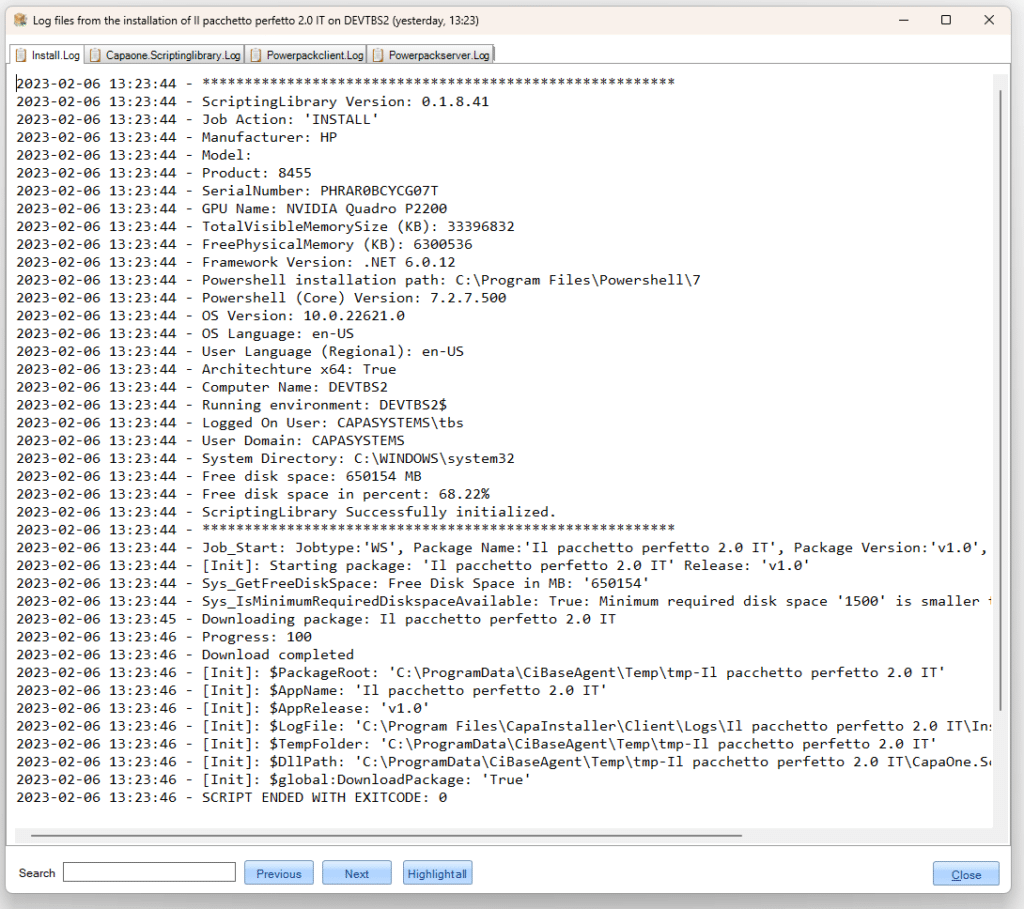
When installing a PowerPack, a log folder is created inside the ClientLogs folder, named after the package, which is ‘The Perfect Package 2.0’ (in Italian); ‘Il pacchetto perfetto 2.0 IT’.
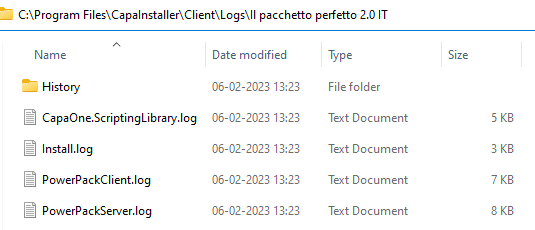
Inside this folder, all relevant logs are written;
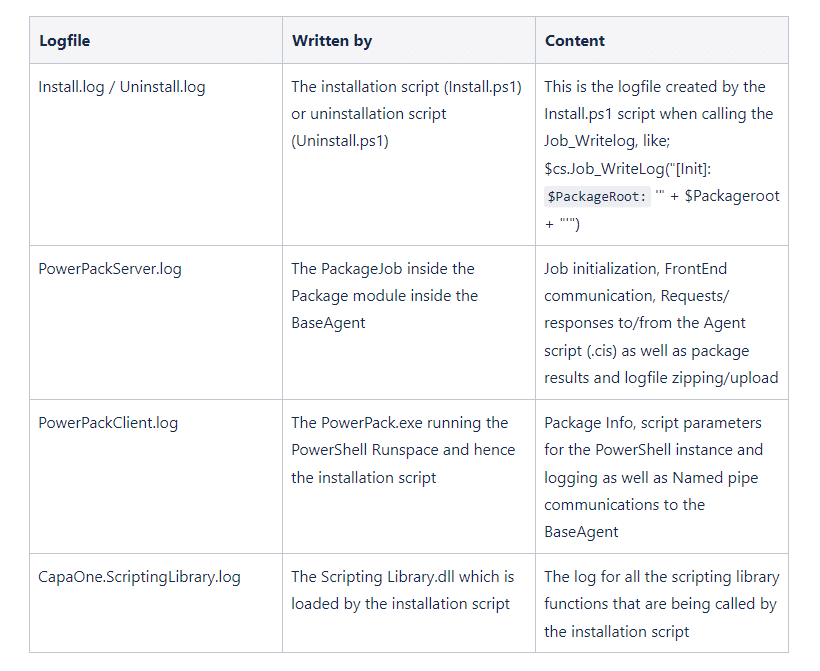
Upon completion, these four (or five) logfiles are zipped and uploaded to the FrontEnd, which saves the zip file in the UNITJOB table of the SQL database.
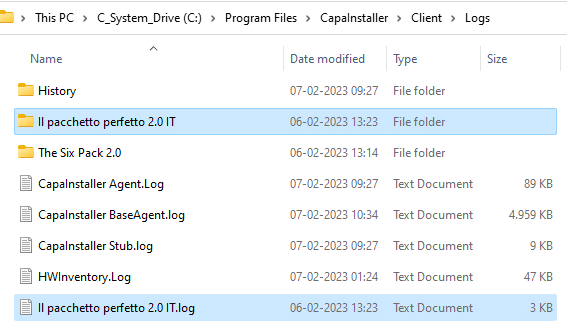
To maintain some compatibility with VBScript-based packages, the Install.log (or Uninstall.log) is copied to the parent log folder to ‘Il pacchetto perfetto 2.0 IT.log’ which is the name of the package;
How to view them
To view the log files of an installation, you must open the CapaInstaller Console and find the device on which the package is installed. Then right-click the package and select ‘View Installation Logs…’
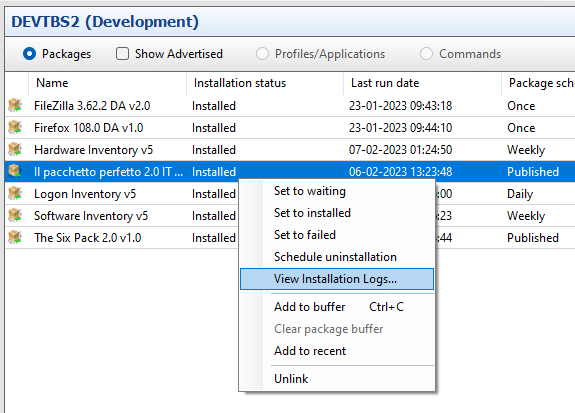
This will open the LogViewer and show the four log files from the package installation. This dialog is similar to that of a VBScript-based package, except four tabs are shown at the top of the form to ease navigation.